Getting started with OSX
19 Feb 2022Welcome! :waves:
If you are here, then like me, you want to dive into the world of OSX and learn all about how to defend Apple computers from malware. We all use them, and many tech-related companies seem to use them even more. Hence, knowing how to defend a Mac is a good investment of our time.
I got a couple assumptions here that I want to share with you
- In order to know how to defend a Mac, we have to know how to attack a Mac
- In order to become adept in attacking and defending Apple devices, we have to understand how these are designed and how non-malicious applications are built
Thus, our first step will be to answer: how do I learn how to build Apple-specific software?
Here, you ought to know that the main technologies we can learn are Swift and objective C. And because objective-C is easier to work with (you can easily build objective C bindings in almost any language), we’ll begin by learning it!
Table of Contents
Roadmap
Some spoilers before you continue reading. For the next couple posts, our goal will be to learn some objective C, because it will come in handy! And then we will dive into the Endpoint Security framework. Because before we dive into any malware, we want to know what tools we have available to detect and prevent malicious activity.
How do I learn objective C
I did some looking and a good place to begin our objective C journey is with Apple’s programming with Objective C guide.
Assuming you read the page, we will now jump into one of the prerequisites listed in the page, start developing Mac apps today.
Make sure that you read through the guide. It talks about setting up your development environment (Xcode) and it links you to a page where you can join the Apple developer program. We’ll cover this in a future post but the TL;DR is that we will ask Apple for entitlements in order to work with some special components of our Macs.
Jump right in
Let’s walk through the third section, Jump right in, Because it is a tad outdated.
The rest of this post will be a walkthrough of the tutorial app. Things will make more sense if you read the text in this post before you read the website (its a tad outdated). All the sections below will correspond to a section in the tutorial.
About Creating Your First Mac App
Nothing to do here, so just read and click next.
Getting Started
To create your application, do the following
- Open Xcode
- Click on “Create a new Xcode project”
- When choosing a template for your project click on the “macOS” menu and select “App”
- Chose a name, and organization identifier, XIB as the interface, and Objective-C as the language
- Chose a place for your new project and create it
Another quick note, you will take a look at a nib file, which Iis an archive of UI elements and other objects your app uses.
To see it, simply click on the MainMenu file listed in the navigation area.
Check all the UI elements that show up.
The last one will be the window container for our app.
Configuring the Window
Some pointers for this section…
Adding UI objects
The “object library” in Xcode 13, is the “+” sign on the editor area. You’ll see the “+” sign on the top-right corner of the editor area.
Most of the options mentioned in the tutorial are not there anymore. But you can search for the following
- “text field”. Do not add the “text field with number formatter”, even though that is what you want for the tutorial. The reason for this is that later on we will add the formatter and it is useful to know how to do this.
- “Vertical slider”
- “Push button”
Also, when you see the website talk about the “Attributes inspector”, this is the Manu that shows up in the utilities area when you click on an UI element. The icon for this is a set of 3 vertical sliders.
Finding the assistant editor
To find the assistant editor, on the menu bar click Editor -> Assistant. Then you’ll be able to add action-methods for the UI objects you added.
Actions and Outlets
After you are done going through the walkthroughs to add outlets for the text field and the slider, you will see the website mentioned that the following code was added to the implementation file, AppDelegate.m
@synthesize textField;
@synthesize slider;
There is a good chance these won’t be there. And for now, we won’t really use them. you won’t actually need them for this tutorial, but its good to know what these mean. We are skipping ahead but checkout this stack overflow answer to understand what this code will do, when added, https://stackoverflow.com/questions/19784454/when-should-i-use-synthesize-explicitly.
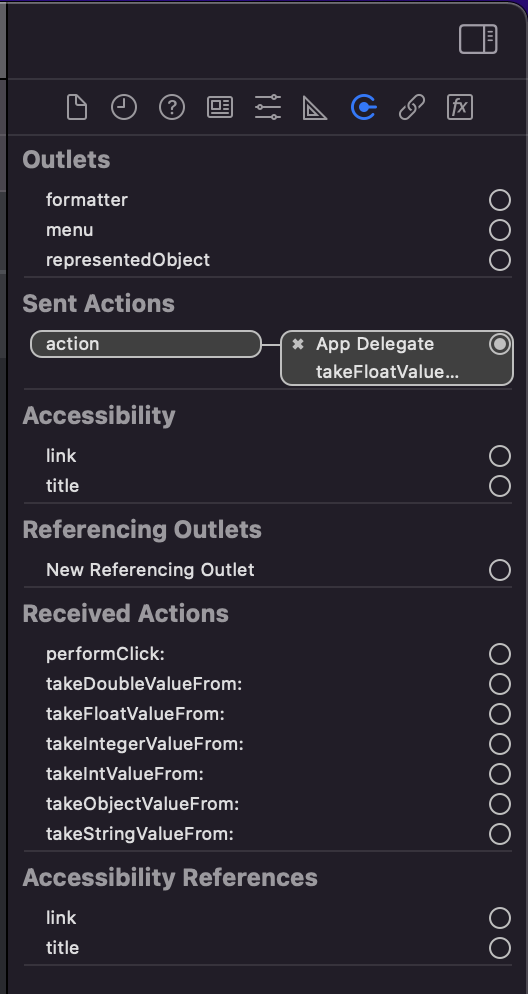
Connections inspector
The tutorial gives you some outdated instructions on how to look at the connections inspector.
Simply click on the UI element you wish to inspect, make sure you open the utilities section of Xcode, and there you will see the menu where we had previously looked at the attributes inspector. Well, if you look to the right of the icon for the attribute inspector, you will find an icon that looks like a stick in a semicircle, and that is what the connections inspector looks like currently.
Adding a Track Object
Adding header and implementation files for the Track
When adding the .m and .h files, instead of choosing the “Objective-C File” chose “Cocoa Class”.
The former will only create an implementation file, .m.
The latter will create both files.
Note: if you see NS_ASSUME_NONNULL_BEGIN in you header file, take a look at this post
Nullability and Objective-C.
Implementing Action Methods
Nothing to do here other than to follow the tutorial.
Adding Polish
Add a number formatter
Again, the Object Library can be opened by clicking on the “+” sign on the top-right corner of the editor section.
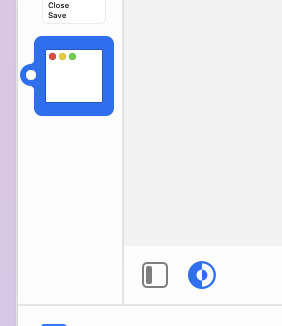
After you add the formatter, the tutorial tells you to go to the “outline view of the nib file”, this is the Document Outline menu in Xcode. To get to this menu, look at the bottom-left of the editor window. There, you’ll see a square icon, click it.
Where to next?
Now that you made it through the tutorial, make sure to go back to start developing Mac apps today. That page has a lot of very good resources that will help you get the hang of objective C and how Mac apps are developed.