Entitlements
26 Feb 2022Welcome back! If you read through Getting started with OSX Then you already now that our first milestone is to gain some familiarity with Apple’s EndpointSecurity framework.
To use the ES framework, you would either need to
- Disable System Integrity Protection (SIP)
- Only do this on a VM!
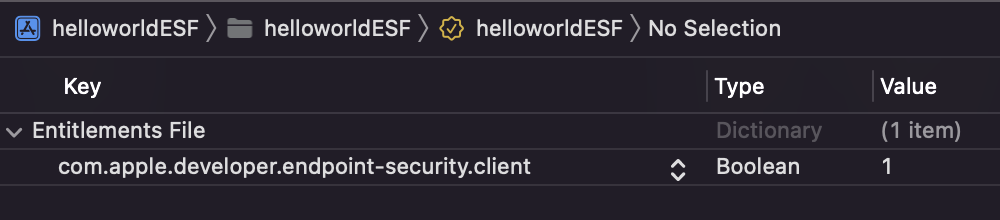
- Have an com.apple.developer.endpoint-security.client entitlement
The rest of this post will cover what entitlements are, what they are for, and how to get one. Moreover, we will write a “hello-world” app using the EndpointSecurity framework. After this, we will be set to begin writing apps that make use of the ES framework.
Table of Contents
Requirements
In order to get an entitlement, you will need to join Apple’s developer program, https://developer.apple.com/programs/. And this will cost you $100 and it will take a couple days for Apple to verify your account.
Note: A big hack here is that you may need to go through the entire process in Safari. If you see an error when you are making the payment to join the developer program, that may be a “fix it”.
Requesting an Entitlement
Once you are a member of Apple’s developer program, you will be able to request entitlements. This part is rather straightforward as well.
The steps are documented in https://developer.apple.com/system-extensions/. At the time of this writing, the link you’ll want is at the bottom-right, under the “Request an Entitlement” header. If you click the link, it will redirect you to a form where you will be able to request an entitlement. In the form you can tell Apple that you want the entitlement for testing/learning purposes.
You’ll get an email about this request and after a few days Apple will tell you that they granted the entitlement. In this same email they will give you instructions on how to use it. They may not make a lot of sense but we will explain them in the following section.
Using the entitlement
When you got the entitlement from Apple, you probably got some instructions that read like this
You will need to enable 2 capabilities for your Bundle ID. Click Identifiers in the sidebar, then select the MAC App ID that you will use for Endpoint Security. Under Capabilities, enable System Extension. Under Additional Capabilities, enable Endpoint Security. Click Save in the top-right of the page, review the alert that appears, and confirm you accept the changes. Then generate a new Development provisioning profile for your App ID by clicking Profiles in the sidebar and the Add button (+) in the upper-left corner.
Once your profile has been created, you’ll need to configure your Xcode project for manual code signing. If your Xcode project doesn’t already have an entitlement file, create a new property list file and change its extension from .plist to .entitlements. Add the keys and values of the entitlements used in your project to the
.entitlementsfile, the follow the rest of the Xcode manual signing process.For troubleshooting, see Technote 2415 Entitlements Troubleshooting and debugging entitlement issues.
Making sense of the Instructions
First, go to your Apple developer account.
First thing that’s mentioned is your bundle ID. The bundle ID is the thing you specify when you create a new Xcode project. It is also something you specify when you create an Identifier in your Apple developer account. The latter one is the thing that really matters as it will allow Apple to “map” your app to you. This will make more sense after we are done. For now, go to your developer account and create an identifier following the above instructions.
Before you proceed and make a provisioning profile, go and create a certificate first. This will be an option on the left-side panel of the page. For this one follow the instructions, there will be a link on the page for “Learn More”, click it and read through it.
Once you have a certificate, now go to the Devices menu and register your computer. You’ll need to do this in order for Apple to allow the EndpointSecurity entitlement to be allowed for your app. The page will then ask you for a “Device ID (UUID)”. To find it, click on the Apple icon on the top-left of your scree -> About This Mac -> System Report… Your device ID will be under the “Provisioning UDID” field.
Once you have your certificate and you’ve registered your device, you will be able to go and create a provisioning profile as described in the above instructions.
In the next section, we will describe in detail how to properly use the entitlement in your app - there are a handful more steps besides creating an .entitlements file.
Actually using the entitlement
Actually using the entitlement
To test our entitlement, we will use the EndpointSecurity framework code that is listed as an example in Endpoint Security > Client.
First, go on and create a new Xcode project. We’ll begin by going to our app’s Signing & Capabilities menu in order to connect it to the provisioning profile we created earlier. To do so, click on the top-level app on the navigator section.
For simplicity, make sure to check the box for “Automatically manage signing”. Then in Team, go an add your Apple developer account. Xcode will ask you to sign in. Here, you can also update the Bundle Identifier to match the bundle identifier you created in your Developer Account.
Now, let’s go and create the entitlement file.
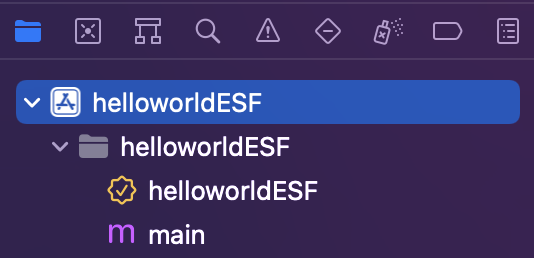
On the Navigator section of Xcode, right-click and select New File.
On the menu that pops up, scroll down to property list and click it.
Rename this new file to <name of app>.entitlements and make sure that this file is at the same level as the entry point to your app (where the main.m file is).
In this file add the following,
Finally, we need to tell Xcode that we want to use the ES framework. To do this, go back to the signing menu of the app, but click on the General tab. Click the “+” sign on the Framework and Libraries section. Then look for the EndpointProtection framework within the menu that pops up.
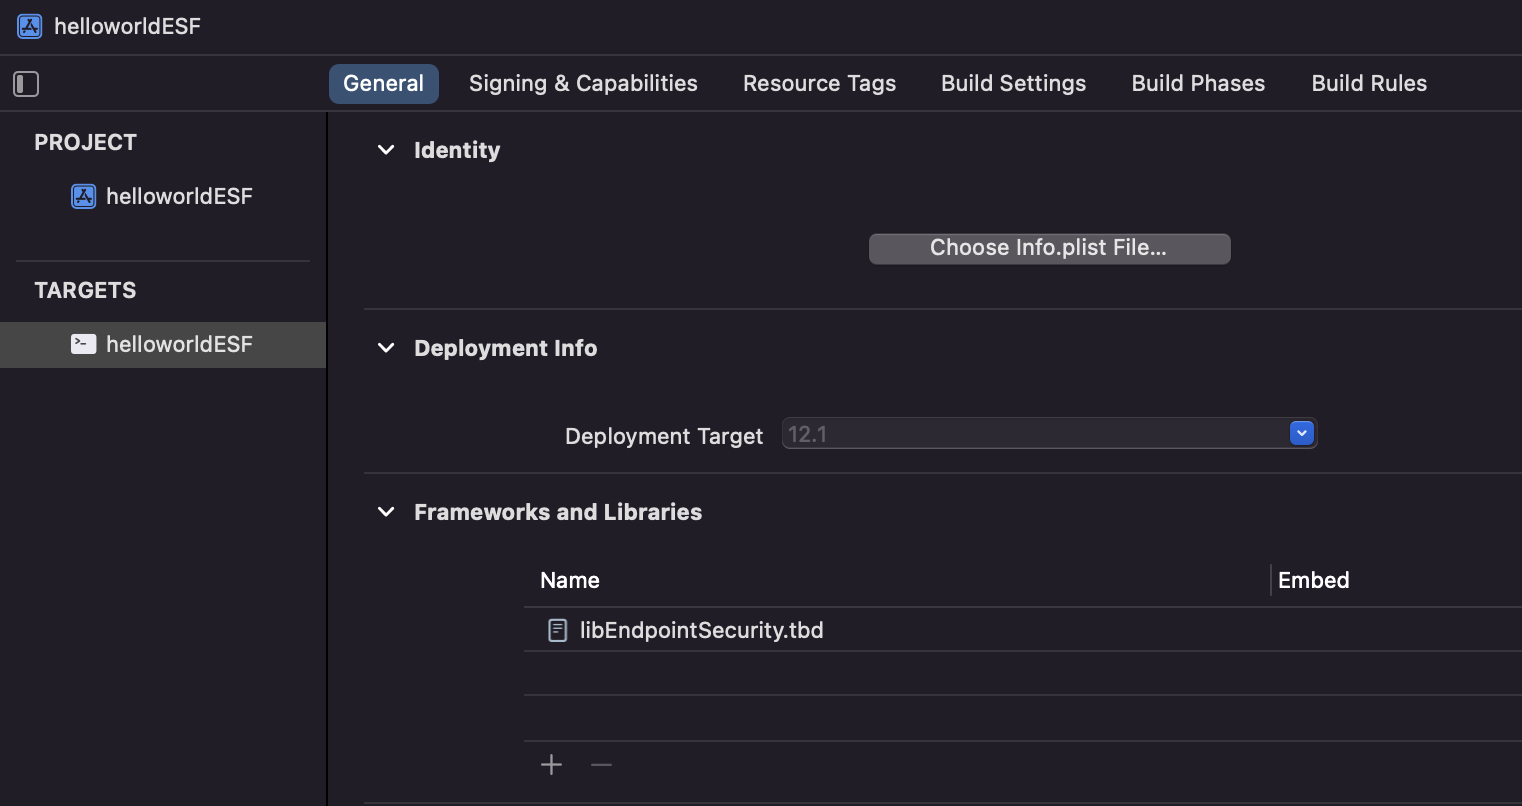
This will add a Frameworks folder into your app.
Open it, click on the libEndpointSecurity file, and look at the utilities section.
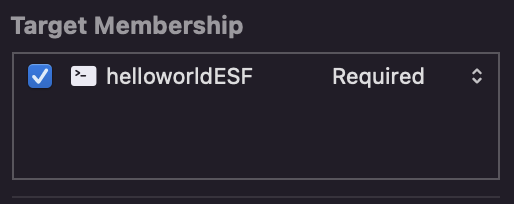
Make sure Target Membership is checked and pointing to your app.
We are now ready to run some code.
Example
The below example comes from the EndpointSecurity client docs. The code is rather straightforward and will come in handy later on. One thing that will be really useful for us now is the error handling, which makes this example the perfect health check for this post.
#import <Foundation/Foundation.h>
#import <EndpointSecurity/EndpointSecurity.h>

int main(int argc, const char * argv[]) {
    @autoreleasepool {
        // insert code here...
        NSLog(@"Hello, World!");

        es_client_t *client = NULL;
        NSLog(@"we just created a null client...");
        es_new_client_result_t newClientResult =
        es_new_client(&client,
                      ^(es_client_t * client, const es_message_t * message) {
            NSLog(@"creating a new es client...");
            switch (message->event_type) {
                case ES_EVENT_TYPE_AUTH_EXEC:
                    es_respond_auth_result(client, message, ES_AUTH_RESULT_ALLOW, true);
                    break;
                default:
                    panic("Found unexpected event type: %i", message->event_type);
                    break;
            }
        });
        NSLog(@"now we are going to check on the client result...");
        NSLog(@"error %d", newClientResult);
        NSLog(@"possible codes: %d %d %d %d %d %d %d",
              ES_NEW_CLIENT_RESULT_SUCCESS,
              ES_NEW_CLIENT_RESULT_ERR_INVALID_ARGUMENT,
              ES_NEW_CLIENT_RESULT_ERR_INTERNAL,
              ES_NEW_CLIENT_RESULT_ERR_NOT_ENTITLED,
              ES_NEW_CLIENT_RESULT_ERR_NOT_PERMITTED,
              ES_NEW_CLIENT_RESULT_ERR_NOT_PRIVILEGED,
              ES_NEW_CLIENT_RESULT_ERR_TOO_MANY_CLIENTS);

        // Handle any errors encountered while creating the client.
        switch (newClientResult) {
            case ES_NEW_CLIENT_RESULT_SUCCESS:
                // Client created successfully; continue.
                break;
            case ES_NEW_CLIENT_RESULT_ERR_NOT_ENTITLED:
                NSLog(@"Extension is missing entitlement.");
                break;
            case ES_NEW_CLIENT_RESULT_ERR_NOT_PRIVILEGED:
                NSLog(@"Extension is not running as root.");
                break;
            case ES_NEW_CLIENT_RESULT_ERR_NOT_PERMITTED:
                // Prompt user to perform Transparency, Consent,
                // and Control (TCC) approval.
                // This error is recoverable; the user can try again after
                // approving the TCC prompt.
                NSLog(@"Need to do TCC approval");
                break;
            case ES_NEW_CLIENT_RESULT_ERR_INVALID_ARGUMENT:
                NSLog(@"Invalid argument to es_new_client(); client or handler was null.");
                break;
            case ES_NEW_CLIENT_RESULT_ERR_TOO_MANY_CLIENTS:
                NSLog(@"Exceeded maximum number of simultaneously-connected ES clients.");
                break;
            case ES_NEW_CLIENT_RESULT_ERR_INTERNAL:
                NSLog(@"Failed to connect to the Endpoint Security subsystem.");
                break;
            default:
                NSLog(@"something else happend...");
        }
    }
    return 0;
}
If you get any errors about entitlements, make sure you have your entitlement file in the same directory as where you are running your code from. If you move a file around in Xcode, it may make you believe the file is in a different place, so open up a terminal and cd your way to check the file.
The other errors are more self-explanatory: you will need to execute the binary as root (the EndpointSecurity framework is a big deal).
If you see the Need to do TCC approval error, then you need to grant full disk access to the binary, and to the terminal you are using to run it.
To do this, click on the Apple icon on the top-left -> System Preferences… -> Security & Privacy -> Privacy.
Then scroll down to where you see the Full Disk Access option.
In there add your binary and the terminal you use to run it.
By the way, if you are wondering, TCC stands for transparency, consent, and control. Read more about TCC controls in Controlling app access to files in macOS.
And that’s that for now! On our next post we will dive deeper into the EndpointSecurity framework and we’ll begin looking into reverse engineering.